Skip to content
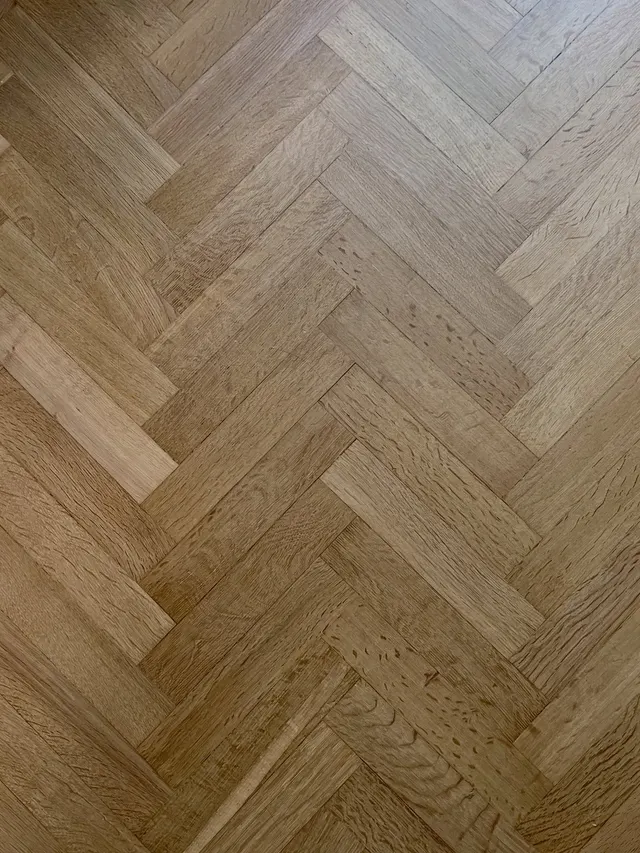
Old herringbone parquet brought back to life, detail from a renovation project.

Redoing your floors

Screed, tiles, wood: what it really takes, step by step.

You
8 – 15 days
Budget
1 200 – 3 000 €
Steps
12

Times and budgets are indicative, for a confident DIYer, surprises excluded.

A floor is the surface you see and the substrate you do not. In an older flat in Nice, under the carpet or the 1970s tiles, you find a tired screed, two or three centimetres of level difference from one room to the next, sometimes terracotta tiles bonded onto plaster. Laying the covering takes three days. Everything else is the substrate.

The order cannot be caught up later: floors come after the chases, the partitions and the ceilings. And every stage brings its own wait. A levelling compound can be covered after 24 to 48 hours; a traditional screed needs several weeks, in the order of a week per centimetre.

Then there is the logistics: 60 m² of tiles weigh more than a tonne, delivered to the pavement outside the building. The rubble goes back down the same staircase. In a copropriété (co-owned building), warn the neighbours and read what the rules say about floor coverings: many require the original acoustic performance to be kept.

The steps

1
/12

Check what you are allowed to lay

Estimated time 0.5 – 1 days

Before the showroom, the copropriété rules. They often say the original floor may not be replaced by a covering with less acoustic insulation. Carpet swapped for tiles with no acoustic underlay is the classic dispute between floors.

Tools

  • copropriété rules
  • tape measure

What goes wrongThe tiles are laid, the neighbour below complains, and what is demanded is that the whole floor comes up.

2
/12

Measure, calculate, order

Estimated time 0.5 – 1 days

Measure every room, add 10 % for offcuts, 15 % for a diagonal layout. Order it all at once, from the same batch. Check the delivery lead time: it drives the programme. And work out where you are going to store a tonne of tiles.

Tools

  • laser distance meter
  • dimensioned plan
  • sack truck

What goes wrongYou are 4 m² short at the end. The top-up batch arrives in a different shade, and the difference shows.

3
/12

Have the asbestos check done before you break anything

Estimated time 0.5 – 1 days

In a building whose permis de construire (building permit) predates July 1997, asbestos can hide in tile adhesives, vinyl floor tiles and certain renders. The survey before works is compulsory as soon as a company is involved — and it is the only way to know what you are about to turn into dust.

Tools

  • certified surveyor

What goes wrongBreaking first and asking afterwards. The fibres are in the home, and the decontamination costs more than the floor.

4
/12

Empty, protect, organise the waste

Estimated time 0.5 – 1 days

The home is emptied completely, doors and skirtings included. Tape up the rooms you are sparing, cover the hall and the lift if the rubble goes that way. Decide now where the waste goes: a skip on the public highway needs a permit to occupy public space from the mairie (town hall).

Tools

  • dust sheets
  • site tape
  • heavy-duty rubble sacks
  • sack truck
5
/12

Take up the old covering

Estimated time 1 – 3 days

The most physical and the noisiest stage. Tiles bedded in mortar come up with a light breaker; bonded tiles take pieces of the screed with them. Reckon on double the time for old bedded tiling — and on noise the neighbours will hear every single day.

Tools

  • light breaker (hired)
  • flat chisel
  • FFP3 mask
  • goggles
  • ear defenders
  • site vacuum

What goes wrongLifting the tiles tears the screed off down to the structural floor. A new bed has to be formed, so weeks more drying.

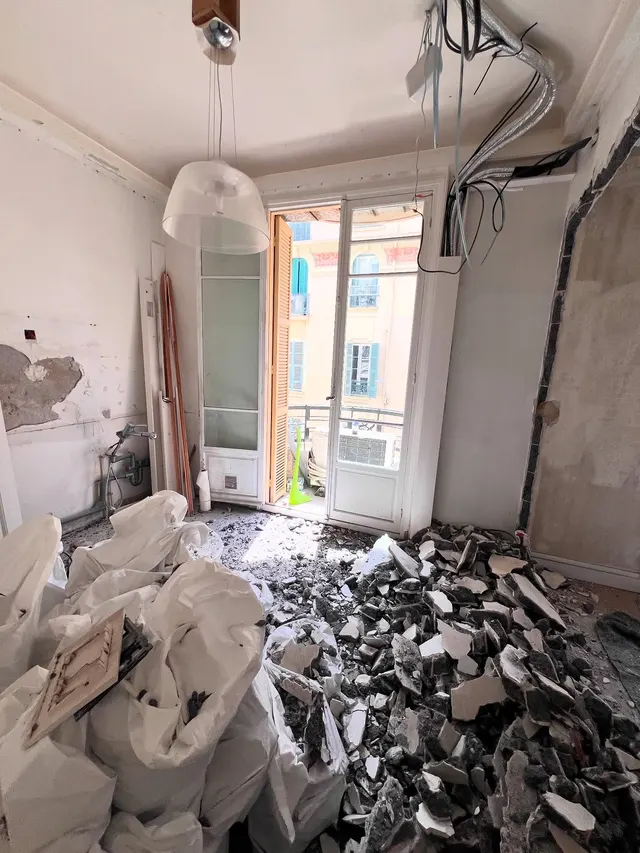
Room protected with dust sheets during the strip-out, rubble sacks and the old floor exposed.
6
/12

Assess the substrate

Estimated time 0.5 – 1 days

Three things to check: flatness, with a 2 m straight edge; soundness, by tapping the floor with a hammer, because anything that rings hollow will come loose; and moisture, which blisters a wood floor and lets an adhesive go. On a timber floor, also check that nothing moves underfoot.

Tools

  • 2 m straight edge
  • spirit level
  • damp meter
  • hammer

What goes wrongLaying over a hollow substrate. Six months later the tiles come loose one by one, and there are no spares left.

Empty room in a flat in Nice before works, old herringbone parquet.
7
/12

Level, or lay a new screed

Estimated time 1 – 2 days

Under a centimetre of correction, a self-levelling compound will do: primer compulsory, precise mixing, the whole room poured in one go. Beyond that you need a screed — and a traditional screed dries slowly. Those weeks cannot be compressed.

Tools

  • bonding primer
  • paddle mixer (hired)
  • smoothing trowel
  • spiked roller
  • spiked shoes

What goes wrongLevelling compound mixed too wet, or laid with no primer. It cracks as it dries, and the only cure is to hack the whole lot off.

8
/12

Set out, then lay the tiles

Estimated time 2 – 4 days

The set-out decides everything: find the starting point that avoids thin cuts where they will be seen, snap the lines, dry-lay a row. Only then the adhesive, a square metre at a time, back-buttered for large formats, with levelling clips and a perimeter joint at the walls.

Tools

  • tile cutter or wet saw (hired)
  • notched trowel
  • levelling clips
  • rubber mallet
  • level
  • chalk line

What goes wrongA large format laid without back-buttering sounds hollow and breaks at the first impact, in the middle of the living room.

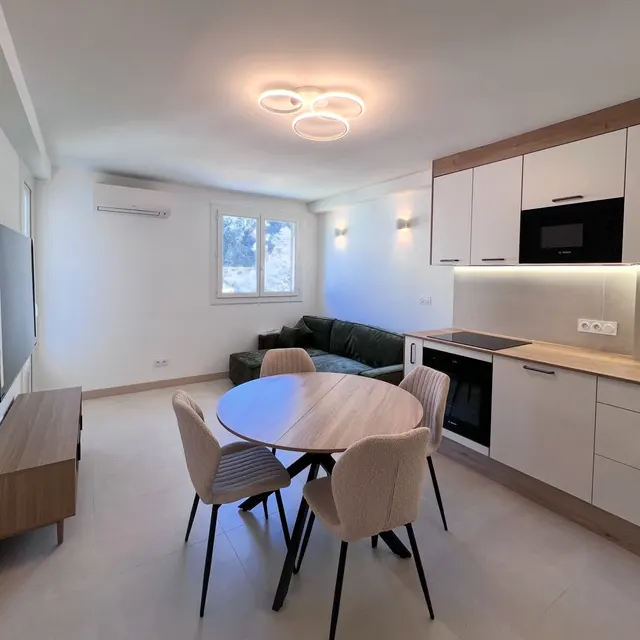
Living room of a 60 m² flat in Nice, large-format tiled floor laid.
9
/12

Cuts, thresholds and awkward details

Estimated time 1 – 2 days

The time goes into the details: around door frames, pipe penetrations, corners that are never at 90°, thresholds between two thicknesses. Every angled cut is measured on the spot and often made twice. This is where the spare tiles disappear.

Tools

  • angle grinder and diamond blade
  • diamond hole saw
  • sliding bevel
  • threshold strips

What goes wrongOne botched cut at the end of the job, and there are no longer enough tiles from the right batch to redo it.

10
/12

Grout, cleaning, cement haze

Estimated time 0.5 – 1 days

Wait at least 24 hours before grouting. The grout is worked in diagonally with a float, pressed home, then sponged off just before it hardens. Too early and it sinks; too late and it leaves a white haze across the whole room.

Tools

  • grout float
  • tiler's sponge
  • bucket with rollers
  • cement haze remover

What goes wrongThe haze dries on matt tiles. Acid cleaner, several passes, and a shade that stays uneven.

11
/12

Lay floating wood flooring in the dry rooms

Estimated time 1 – 2 days

The boards acclimatise flat in the room for 48 hours. Underlay rolled out, boards running towards the light, end joints staggered by at least 30 cm, and above all an 8 to 10 mm gap against every wall and every obstacle. That gap hides behind the skirting; it is not optional.

Tools

  • mitre saw (hired)
  • expansion spacers
  • pull bar
  • mallet
  • acoustic underlay

What goes wrongThe perimeter gap is forgotten along one wall. At the first humid summer, the floor lifts in a wave.

Renovated bedroom in Nice with a pale wooden floor.
12
/12

Skirtings, thresholds and back into use

Estimated time 1 – 2 days

Mitred skirtings, threshold strips, sealant in the sensitive corners, then cleaning: cutting dust keeps settling for days. Wait before bringing the heavy furniture back. And keep ten spare tiles in the cellar; they will be worth gold in five years.

Tools

  • mitre saw
  • sealant gun
  • skirting adhesive
  • vacuum
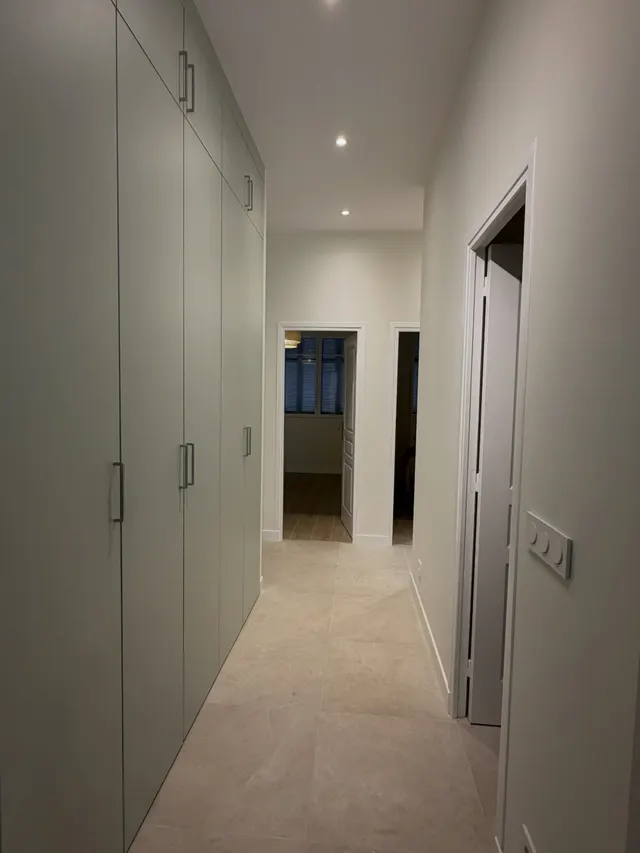
Finished hallway with tiled floor, skirtings and thresholds, project in Menton.

Do it yourself, or have it done

  • You can do this
  • Better left to a pro
  • Regulated by law
  • You can do thisTaking up carpet or a floating wood floorTime and bags, no technique: the stage that pays off most when you do it yourself.
  • Regulated by lawAsbestos survey before breaking up an old floorCompulsory as soon as a company is involved in a building from before July 1997, and reserved to a certified surveyor.
  • You can do thisSelf-levelling compound under a centimetreWithin reach if the primer goes on and the mix is right; the classic mistake is mixing it too wet.
  • Better left to a proA levelling screed of several centimetresMix, reinforcement, isolation layer, drying: a bad screed breaks up, it does not get repaired.
  • Better left to a proLaying large-format tilesBack-buttering, flatness to the millimetre and two people to handle them: no substrate defect gets past.
  • Better left to a proWaterproofing under the tiles of a wet roomInvisible once tiled over; a defect only shows at the neighbour's below.
  • Regulated by lawChanging the floor covering in a co-owned buildingMany sets of rules require the original acoustic performance to be kept; ignoring that can mean putting it all back.
  • You can do thisLaying floating wood flooring in a dry roomThe most approachable installation in the trade, if the acclimatisation and the perimeter gap are respected.

You or Zenith

You

  • 8 to 15 days of your time on a flat of 50 to 60 m²
  • €1,200 to €3,000 of materials, tools and hire (indicative)
  • Drying times that cannot be compressed, between screed, adhesive and grout
  • No recourse if the tiles sound hollow or the wood floor swells in six months
  • More than a tonne to carry up, and the rubble to take away
  • The copropriété, the recycling centre or the skip, and the neighbours to manage

Zenith

  • Free quote within 48 h
  • One contact from floor to ceiling
  • Price agreed before work starts

Price range

  • Loading…
  • Loading…
  • Loading…

Range excl. VAT — VAT varies with the type of work

Indicative range, not contractually binding.

This estimate is not a quote: the final price is set with you, after a site visit.

Common questions

How long does it take to redo the floors of a 60 m² flat?

Count on 8 to 15 days of actual work, plus the drying: 24 to 48 hours after a levelling compound, several weeks after a screed. In practice the job spreads over three to six weeks if you work evenings and weekends.

Can you lay tiles over old tiles?

Yes, if the old ones are perfectly bonded, flat and clean, and if you accept losing one to two centimetres of height — which moves thresholds and means trimming doors. Every hollow tile has to come up first.

Do you need the co-owners' agreement to replace carpet with tiles?

The floor is a private part, but many sets of rules require the original acoustic insulation to be kept. Read them before you buy and lay a suitable underlay: it is the most frequent dispute between neighbours on different floors.

Which comes first, the floor or the painting?

Services, partitions, skimming and the first coat of paint all come before the floor. The covering follows, then the skirtings, and the final coat as the finish. Laying the floor too early means protecting it — and then repairing it — for the rest of the job.

How long after levelling before you can lay?

A self-levelling compound can be walked on within hours and covered in 24 to 48 hours depending on thickness and humidity. In winter, or in a closed-up home, allow longer: laying over a damp levelling compound means a debonding that nothing puts right.