Skip to content
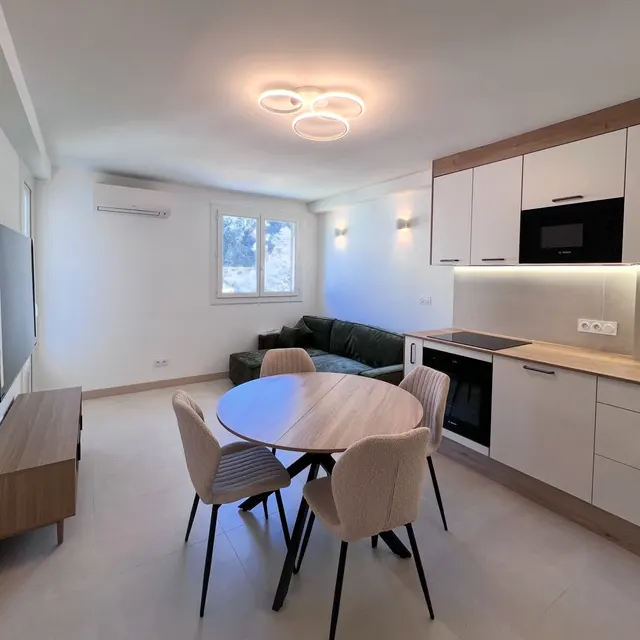
Renovated open-plan kitchen: white units, wooden worktop, induction hob and built-in oven

Fitting a new kitchen

Twelve steps between the old kitchen and the first saucepan.

You
10 – 20 days
Budget
900 – 2 400 €
Steps
12

Times and budgets are indicative, for a confident DIYer, surprises excluded.

A kitchen looks like flat-pack assembly. In reality the units are the easy part, and the last one. Before them: a waste pipe with a steady fall, dedicated circuits for every large appliance, walls flat enough for a splashback, a floor level enough to set the cabinets on.

The calendar is not set by you but by the supplier. A fitted kitchen is delivered several weeks after the order, a stone worktop is templated on cabinets that are already in place and then goes to the workshop, and one out-of-stock appliance blocks the final connection.

Then there is daily life. The job starts the day you empty the cupboards and ends the day the trap is connected. In between, the household eats out. That is the duration to estimate before you start.

The steps

1
/12

Settle the layout and place the order

Estimated time 0.5 – 1 days

Draw the sink–hob–fridge triangle, then check what the room actually allows: where the water arrives, where the waste falls, where the extractor vents, where the consumer unit is. Then order, and write down the delivery date: that date will set the end of the job.

Tools

  • tape measure
  • laser distance meter
  • dimensioned plan

What goes wrongDrawing the sink at the opposite end from the stack. Four metres of waste pipe under the units, and a fall that eats into the cabinet.

2
/12

Empty, isolate, protect

Estimated time 0.5 days

Empty the cupboards, turn off the water and the circuits concerned, check there is no voltage. If the hob runs on gas, removing and capping it is a job for a professional. Protect the floor and the routes through the flat: taking off a tiled splashback sends dust everywhere.

Tools

  • multimeter or voltage tester
  • adjustable spanner
  • dust sheets and site tape
  • boxes

What goes wrongUndoing the gas hose yourself "just to pull the cooker out". A leak on an unchecked fitting cannot be smelled.

3
/12

Strip out the old kitchen

Estimated time 0.5 – 1.5 days

Wall units, worktop, base units, then splashback and plinths. Leave the visible fixings in place until you know what runs behind them. A complete kitchen makes a considerable volume of waste: organise how it leaves the building first.

Tools

  • cordless screwdriver
  • crowbar
  • angle grinder and diamond blade
  • rubble sacks

What goes wrongTearing off a splashback bonded onto plaster. The wall comes with it, and it has to be rebuilt before anything else goes on.

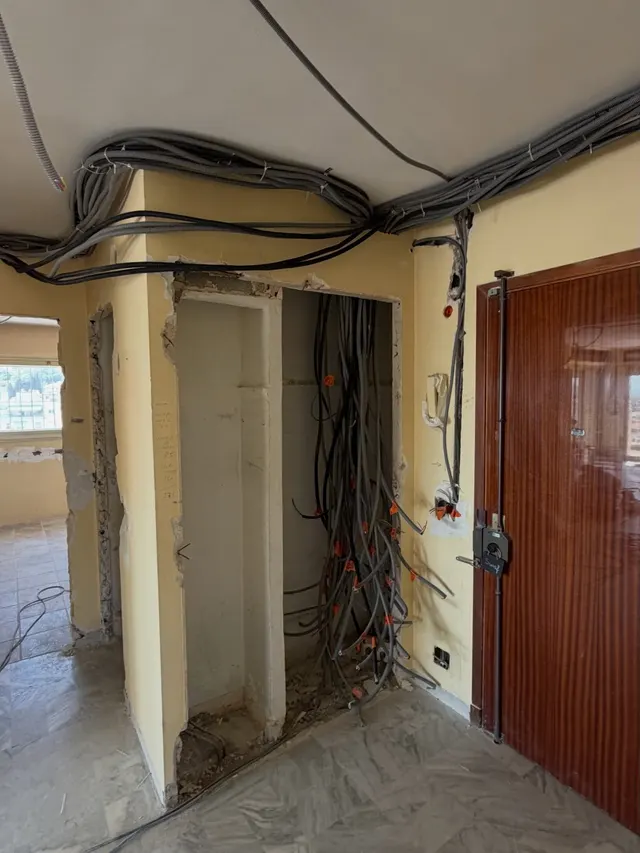
Room stripped back: bare walls, protected floor, rubble sacks and cables left waiting
4
/12

Rework the water supply and the wastes

Estimated time 1 – 2 days

Hot and cold feeds to the sink and the dishwasher, with isolating valves you can still reach once the units are in. Waste with a steady fall to the stack, an accessible trap, a branch for the dishwasher. Pressure-test before the cabinets go in.

Tools

  • press tool (hired)
  • multilayer pipe cutter
  • spirit level
  • hole saw

What goes wrongA waste run that is too flat over a long distance. The dishwasher backs up, the smell comes with it, and it is all under screwed-down cabinets.

5
/12

Rework the electrics

Estimated time 1 – 2 days

A kitchen concentrates the heavy users: hob, oven, dishwasher, washing machine, fridge and freezer. NF C 15-100 (the French electrical standard) requires dedicated circuits and a minimum number of sockets above the worktop. Position the outlets before the units: a socket behind a full cabinet is useless.

Tools

  • wall chaser (hired)
  • ICTA conduit and back boxes
  • multimeter
  • site vacuum

What goes wrongWiring a hob onto the socket circuit. The breaker trips as soon as the oven and the hob run together: the wall has to be opened again.

Horizontal chases and cable runs around a window, before they are filled in
6
/12

Make good the walls

Estimated time 1 – 2 days

Take off the old tiling, fill the chases, skim, sand. A kitchen wall has to be flat: wall units hang on a rail and every defect reads along the line of the doors. Check the corners too: an out-of-square corner leaves a gap nothing will close.

Tools

  • filling knives
  • 2 m straight edge
  • long-reach sander (hired)
  • skim coat

What goes wrongHanging wall units on a wall that is two centimetres out. The worktop and the cabinets are no longer parallel, and it shows from the living room.

7
/12

Floor: level it, then lay it

Estimated time 1.5 – 3 days

The floor goes down before the units, across the whole surface, including under the cabinets: it is the only way to change the kitchen one day without redoing the floor. Levelling compound, drying, floor covering, then more drying.

Tools

  • paddle mixer on a drill
  • smoothing trowel
  • electric tile cutter (hired)
  • notched trowel
  • laser level

What goes wrongTiling only the visible parts. The day the layout changes, that identical tile is no longer made.

8
/12

Paint before the units go in

Estimated time 1 – 2 days

Ceiling then walls, two coats, while the room is empty. Painting afterwards means working with a brush in ten-centimetre gaps. Let it dry: fresh paint marks at the slightest contact with a cabinet.

Tools

  • rollers and brushes
  • dust sheet and masking tape
  • step ladder
  • washable paint

What goes wrongLeaving the painting until the end. The touch-ups around the units stay visible in raking light.

9
/12

Assemble and hang the cabinets

Estimated time 1.5 – 2.5 days

Assemble flat, then fit: base units are adjusted on their legs, wall units hang on a rail fixed with plugs suited to the real substrate. Check the level along the whole run, not cabinet by cabinet.

Tools

  • cordless screwdriver and bits
  • laser level
  • 2 m straight edge
  • clamps
  • suitable wall plugs

What goes wrongStandard plugs in a hollow partition for wall units loaded with crockery. They come down slowly, then all at once.

Finished kitchen with a built-in oven housing, olive green fronts and full-height storage
10
/12

Fit the worktop

Estimated time 0.5 – 1 days

The worktop goes onto cabinets that are already level. Sink and hob cut-outs are made with a fine-toothed jigsaw blade for laminate, with a sealer on the cut edges. In stone or ceramic the cutting is done in the workshop: one to two weeks more.

Tools

  • jigsaw with a fine blade
  • cutting guide
  • sealant
  • clamps

What goes wrongA sink cut-out whose edges are not sealed. The laminate swells within months and the whole worktop is for the skip.

11
/12

Connect the appliances, fit the splashback

Estimated time 1 – 2 days

Sink, trap, dishwasher, hob, oven, extractor: each connection is simple on its own, but they are all made on your knees inside a cabinet, in the order access allows. The splashback goes on afterwards, with a flexible seal all round.

Tools

  • adjustable spanner
  • slip-joint pliers
  • silicone gun
  • fine notched trowel

What goes wrongForgetting the flexible seal between worktop and splashback. Water gets behind, and the base unit swells and warps.

12
/12

Adjust, finish, clean

Estimated time 0.5 – 1 days

Adjusting hinges and drawers, aligning handles, plinths, silicone around the sink. Half a day that almost nobody plans for, and that makes all the visual difference. Run every appliance once before you put the crockery away.

Tools

  • precision screwdrivers
  • spirit level
  • silicone gun
  • mitre saw

What goes wrongNot adjusting the fronts. Uneven two-millimetre gaps turn a new kitchen into a badly fitted one.

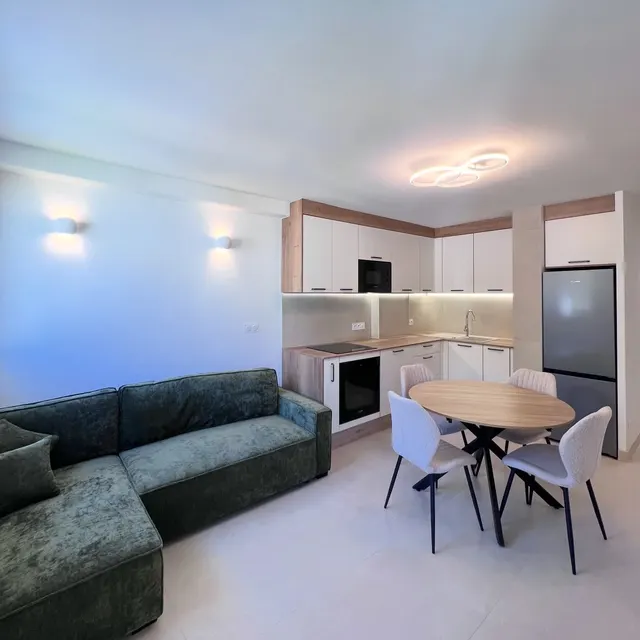
Living room with the finished open kitchen, worktop and under-cabinet lighting

Do it yourself, or have it done

  • You can do this
  • Better left to a pro
  • Regulated by law
  • You can do thisStripping out the old kitchenDismantling and carrying: no risk once the water, the power and the gas are off.
  • You can do thisAssembling the cabinets and adjusting the frontsRepetitive and within reach; patience counts for more than technique.
  • You can do thisPainting the walls and the ceilingThe room is empty at that point in the job: the best moment to do it yourself.
  • Better left to a proMoving the waste water outletThe fall decides whether the kitchen works, and the pipework is sealed in under the units.
  • Regulated by lawDedicated circuits and protective devicesNF C 15-100 requires dedicated circuits and a minimum number of sockets above the worktop.
  • Regulated by lawAny work on the gas installationA gas installation must be carried out by a professional who issues a certificate of conformity.
  • Better left to a proCutting a stone, quartz or ceramic worktopTemplated and cut in the workshop: one bad cut means buying the whole worktop again.
  • You can do thisCutting a laminate worktop and fitting the sinkDoable with a fine blade and a cutting guide, provided the edges are sealed.
  • Better left to a proLevelling the floor before the coveringAny lack of flatness is paid for in the cabinet adjustment and the line of the worktop.
  • Better left to a proA tiled or large-format splashbackA small surface, closely looked at, between two lines that forgive nothing.

You or Zenith

You

  • 10 to 20 days of actual work, plus the wait for the kitchen to be delivered
  • €900 to €2,400 of materials, consumables and tool hire (indicative), excluding units and appliances
  • No recourse if a waste pipe backs up or a circuit is undersized
  • A house with no kitchen, from the strip-out to the last connection
  • The plumbing, the electrics, the floor and the supplier, on your own

Zenith

  • Free quote within 48 h
  • One contact from floor to ceiling
  • Price agreed before work starts

Price range

  • Loading…
  • Loading…

Range excl. VAT — VAT varies with the type of work

Indicative range, not contractually binding.

This estimate is not a quote: the final price is set with you, after a site visit.

Common questions

How long do you go without a kitchen?

On your own, ten to twenty days of actual work, but three to six weeks of real life: drying times, weekends and the kitchen delivery stretch the calendar. The count starts the day you empty the cupboards, not the day you pick up a screwdriver.

Do you need a professional to connect an induction hob?

An induction hob needs a dedicated circuit, the right cable size and a breaker at the consumer unit. If the outlet exists and matches the load, the final connection is simple. If the circuit has to be created, that falls under NF C 15-100. For a gas hob, the work is reserved for a professional.

Can you keep the old floor tiles?

Yes if they are sound, well bonded and flat enough: degrease, prime, and check the height under the worktop and under the doors. The real problem is not technical: the old floor often stops exactly where the old kitchen began.

Which comes first: floor, paint or units?

Services, walls, floor, paint, then units. The floor runs under the cabinets so the kitchen stays replaceable, and the painting is done in an empty room. Reversing that order costs you visible touch-ups.

Can the sink be moved elsewhere in the room?

It depends on the distance to the stack and the fall available under the units. Moving it a metre often works; changing wall means a long pipe run or a pump. Ask the question before you draw the layout, not after you have ordered.