Skip to content
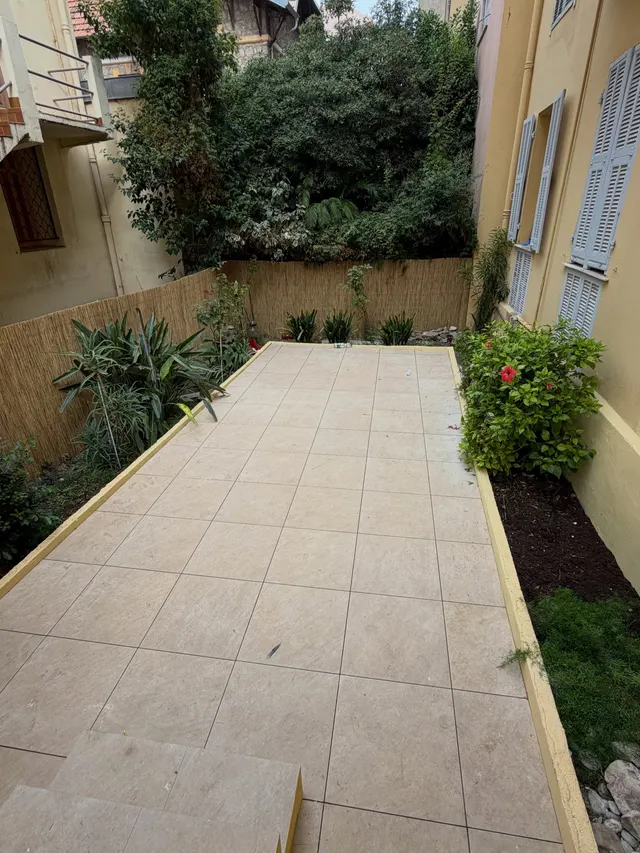
Tiled outdoor terrace with new edging, renovation project in Menton.

Outdoor masonry

Concrete forgives nothing. And outdoors, your work is seen from the street.

You
10 – 20 days
Budget
1 500 – 4 000 €
Steps
11

Times and budgets are indicative, for a confident DIYer, surprises excluded.

An outdoor structure stands on what is buried. The visible part — the render, the tiling, the colour — is the last week. Before it come the earthworks, the foundations, the reinforcement and the time concrete takes to become concrete: a few days before you can walk on it, around 28 days to reach its strength.

Outdoors there is also a third party in the conversation: the mairie (town hall). A boundary wall, a change to the external appearance or a re-rendering may require a déclaration préalable (prior works declaration) depending on the commune and the zone of the PLU (local planning code), and the rules are stricter near a listed monument or in a protected area. The PLU also sets heights, permitted colours and where you may build. You ask at the town hall before buying the blocks, not after.

Finally, the logistics weigh. A cubic metre of concrete is more than two tonnes. Sand, blocks and cement arrive on pallets you have to be able to unload and store dry. The excavated soil has to go somewhere. And on the Côte d'Azur, an autumn storm can flood an open trench in an hour.

The steps

1
/11

Check what the PLU and the town hall allow

Estimated time 1 – 2 days

Before any drawing, the planning rules: maximum height for a boundary wall, appearance, colours, position relative to the boundary. Depending on the commune and the zone, a wall or a change of external appearance requires a prior works declaration. The planning department answers free of charge — one visit that saves months of trouble.

Tools

  • extract from the PLU
  • land registry plan
  • appointment at the town hall

What goes wrongA wall built 40 cm too high. Putting it right means demolishing the top course and rebuilding the coping.
2
/11

Check the boundary and talk to the neighbours

Estimated time 0.5 – 1 days

The legal boundary is not where the hedge has grown. A survey by a chartered land surveyor settles the doubt, and it is cheaper to pay for a survey than for a court case. Tell your neighbour about the project, how long it will take and the machines coming through: a wall built without a word becomes a permanent quarrel.

Tools

  • chartered land surveyor
  • title deeds
  • land registry plan

What goes wrongThe wall encroaches 15 cm onto the neighbour's land. Demolition can be ordered, with no compensation.

3
/11

Get to know the ground and what is already there

Estimated time 0.5 – 1 days

You dig a trial hole to see what is underneath: made ground, clay, rock, buried services. In the hills behind Nice, the slope and the run-off decide the sizing. You also locate the buried services, and look at what is already there: an old low wall is demolished first, it cannot be dealt with afterwards.

Tools

  • spade and pick
  • digging bar
  • service locator
  • laser level

What goes wrongYou hit rock at 40 cm. Digging by hand becomes impossible and a machine is needed.

4
/11

Set out: line, level, square

Estimated time 0.5 – 1 days

Profile boards, string lines pulled tight, square checked on the diagonals, levels transferred with a laser. Anything that is wrong here stays wrong until the last course. It is the most valuable hour of the whole job, and the one you always want to cut short.

Tools

  • site laser level
  • string line
  • profile boards
  • builder's square
  • 30 m tape measure

What goes wrong3 cm out at the setting-out stage. The wall runs off line and the error only shows once the render is on.

5
/11

Dig the earthworks and the foundations

Estimated time 1 – 3 days

The trench goes below frost level and down to sound ground, its width and depth depending on the load. For a few linear metres, spade and pick will do; beyond that it is a mini-digger. And excavated soil expands: decide where it goes before you start digging.

Tools

  • mini-digger (hired)
  • spade, pick, digging bar
  • wheelbarrow
  • bulk bags

What goes wrongThe trench is left open in the rain. The sides collapse and it all has to be dug again, wider.

6
/11

Reinforce and pour the footing

Estimated time 1 – 2 days

Blinding concrete, reinforcement set on spacers to keep the cover, vertical starter bars in place, then a continuous pour. The reinforcement is not decorative: it is what takes the forces. The sizing itself is calculated — it is not copied from a video.

Tools

  • concrete mixer (hired)
  • reinforcement and spacers
  • tying pliers
  • vibrating beam or poker
  • level

What goes wrongReinforcement laid straight on the soil. It rusts, expands and blows the concrete apart within a few years.

7
/11

Build the wall in blocks

Estimated time 2 – 5 days

First course to the line and the level, even mortar joints, bonds staggered, plumb and alignment checked on every course. You lay three to five courses a day and then stop: beyond that the fresh mortar moves and the wall can open up. Regularity beats speed.

Tools

  • trowel and float
  • mixing tub
  • concrete mixer
  • plumb bob
  • 1.20 m level
  • angle grinder

What goes wrongToo many courses in one go. The wall deforms under its own fresh weight and has to come back down.

8
/11

Ring beams, top course and coping

Estimated time 1 – 2 days

Vertical ring beams in the corner blocks, a horizontal ring beam at the top, and a coping that throws the water clear. That is what keeps the wall from cracking at the corners and the water from running down inside the blocks. A wall with no coping is dirty within a winter and cracked within a few years.

Tools

  • hollow formwork blocks or shuttering
  • ring beam reinforcement
  • concrete mixer
  • straight edge

What goes wrongNo drip groove under the coping. The water runs down the face of the wall and stains the render for good.

9
/11

Pour a terrace slab

Estimated time 1 – 3 days

Dig out, compacted stone sub-base, polythene membrane, mesh on spacers, then a single pour with a fall of 1 to 2 % away from the house for the water to run off. Plan an expansion joint against the building. The concrete can be walked on within a few days, but reaches its strength around 28 days.

Tools

  • plate compactor (hired)
  • reinforcing mesh
  • screeding rule
  • power float
  • polythene membrane

What goes wrongA slab poured flat, up against the façade. The water sits there and rises into the wall of the house.

10
/11

Rendering: the work that is seen from the street

Estimated time 2 – 4 days

Spatterdash key coat, body coat ruled off, float or scraped finish. Render is worked in overcast weather, never in full summer sun nor on a frozen substrate, and the wall is dampened first. On a façade you have to keep going across a whole elevation without stopping: every restart leaves a visible mark.

Tools

  • render spraying machine (hired)
  • aluminium straight edge
  • floats
  • mobile tower (hired)
  • shade sheeting

What goes wrongThe render is picked up again the next day in the middle of a wall. The join stays visible for ever.

11
/11

Re-rendering a façade: scaffold, hacking off, repairs

Estimated time 4 – 8 days

Re-rendering starts with a scaffold erected and stabilised — and standing on the pavement, it needs a highway permit. Then you hack off the hollow areas, treat the cracks, repair, and apply. Working at height remains the real subject.

Tools

  • scaffolding (hired)
  • breaker
  • pressure washer
  • harness
  • repair products

What goes wrongRendering over live cracks without treating them. They come back within a year, in exactly the same place.

Do it yourself, or have it done

  • You can do this
  • Better left to a pro
  • Regulated by law
  • You can do thisDemolishing an old low wall or edgingHandling and sorting, no structural risk as long as nothing is retaining soil.
  • Regulated by lawPrior works declaration for a wall or a change of appearanceThe formality depends on the commune and the PLU zone: ask at the town hall before buying materials.
  • Better left to a proSetting out the property boundaryOnly a chartered land surveyor sets a boundary that can be relied on — the one document that holds if it is contested.
  • You can do thisDigging a few metres by handFeasible if the ground is soft; the moment the digging bar rings on rock, it is a machine you need.
  • Better left to a proSizing the foundations and the reinforcementSection and reinforcement depend on the load and the ground; an undersized footing shows up ten years later, as cracks.
  • You can do thisBuilding a low boundary wallWithin reach with method: careful setting-out, three to five courses a day, ring beams respected.
  • Better left to a proA retaining wallIt holds back tonnes of soil and water: drainage, weep holes and calculation are essential, and collapse is sudden.
  • Better left to a proA terrace slab of more than a few square metresThe pour is done in one go: beyond one mixer you need a ready-mix truck, people and a steady screeding rhythm.
  • Regulated by lawRe-rendering with a scaffold on public landOccupying the pavement needs a highway permit, and working at height requires compliant scaffolding.

You or Zenith

You

  • 10 to 20 days of your time, weather included
  • €1,500 to €4,000 of materials, tools and hire (indicative)
  • Curing times that are not negotiable
  • No recourse if the wall cracks or the slab holds water
  • The town hall formalities, the boundary survey and the relationship with the neighbour
  • Tonnes to unload, carry and take away

Zenith

  • Free quote within 48 h
  • One contact from floor to ceiling
  • Price agreed before work starts

Price range

  • Loading…
  • Loading…
  • Loading…

Range excl. VAT — VAT varies with the type of work

Indicative range, not contractually binding.

This estimate is not a quote: the final price is set with you, after a site visit.

Common questions

Do you need permission to build a boundary wall?

It depends on the commune and the PLU zone: many require a prior works declaration, and the PLU also fixes the permitted height and appearance. In a protected area the rules are stricter. A visit to the planning department at the town hall settles it in ten minutes.

How long does concrete need to cure?

You can walk on it after a few days, but concrete reaches its reference strength around 28 days. In between, keep heavy loads off. In hot weather it has to be kept damp to avoid shrinkage cracking — a summer in Nice is an enemy of fresh concrete.

Can you pour a concrete terrace yourself?

A few square metres, yes, with a mixer and some method. Beyond that, the pour has to be done in one go: you need a ready-mix truck, several pairs of hands and a steady screeding rhythm. A slab poured over two days keeps a permanent line of weakness.

Do you need a declaration to redo your façade?

As soon as the external appearance changes — colour, material, openings — a prior works declaration is generally needed, and some communes require one even for a simple re-render. In Nice as elsewhere, check with the town hall: displaying the permission on site is part of the job.

What is the right season for masonry on the Côte d'Azur?

Spring and autumn. In high summer, mortar and render dry too fast and crack; in winter, a night frost can ruin fresh work, even here at altitude. And a storm over an open trench costs several days.